
RouteSavvy User Guide – 5.2 – Shape Edit/Actions
Shape Actions
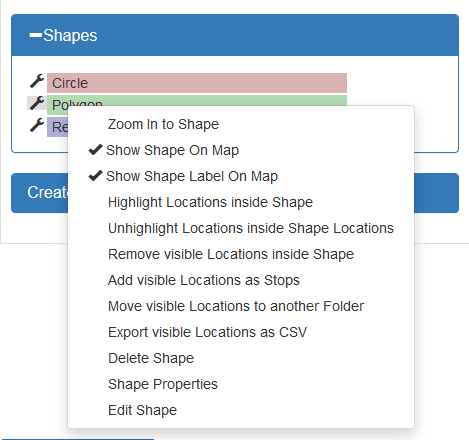
Right mouse click over a Shape opens a context menu of actions.

“Zoom In to Shape” changes the map view to center on that Shape.
“Show Shape on Map” toggles shape visibility on map.
“Highlight/Unhighlight Locations inside Shape” adds yellow highlight to the Locations inside the Shape
“Remove Visible Locations inside Shape” deletes Location icons inside the area. This is a permanent removal of Locations from their folder.
“Add Visible Locations as Stops” adds all the Locations inside the gray area to the current Stop list.
“Move Visible Locations to another Folder” moves Locations inside Shape to a different folder.
“Export visible Locations as CSV” opens a file dialog and saves the Locations in the Shape to a CSV format file.
“Delete Shape”, “Shape Properties”, and “Edit Shape” options provide edit capabilities for the selected Shape.
“Shape Properties” selection allows edits to Shape properties name, fill color, and opacity.
Edit Shape Appearance
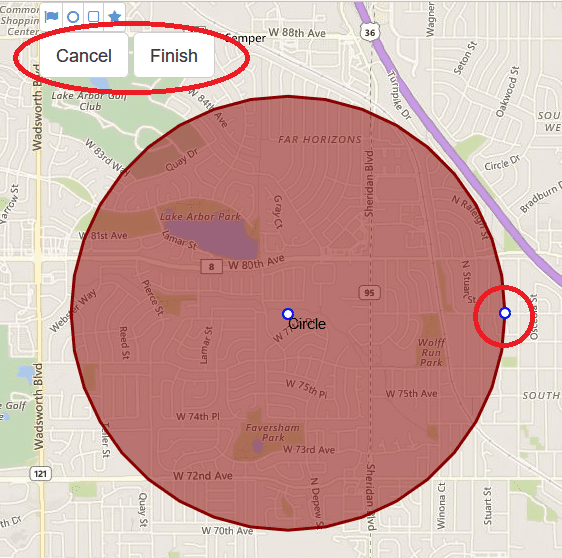
The edit option for circles adds edit icons to center and radius. The circle center icon may be dragged to a new Location and the radius icon adjusted. When edits are completed the Finish button will save the Shape with new edits. The Cancel button will remove the edits and revert to the original Shape.
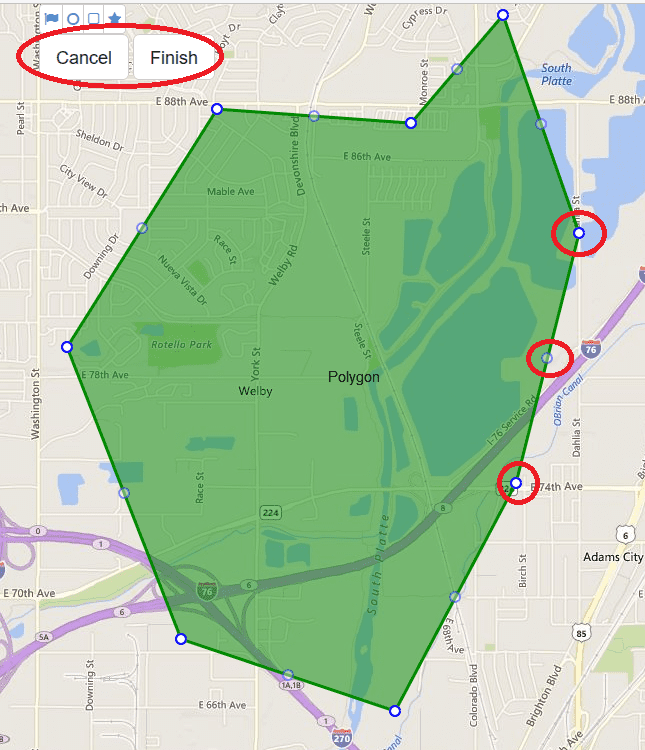
The Edit Shape option for rectangles and polygons add edit icons to each vertex and also adds additional vertices in between. Each of these icons may dragged to a new position. When edits are completed the Finish button will save the Shape with new edits. The Cancel button will remove the edits and revert to the original Shape.
Right clicking on the shape in the menu or left clicking the wrench icon will also access shape actions. Delete Shape, Shape Properties, and Edit Shape etc. Additionally in this menu you can Show Shape on Map and Show Shape Label on Map to show/hide shape and label.
If you have questions contact RouteSavvy Support.