Search

RouteSavvy User Guide – 2.3 – Single Address Import

There are multiple ways to add a single addresses to RouteSavvy, which can be repeated if you have multiple. If you have many addresses try using the Data Wizard in the previous section.

“Add Location” Button

Click the Add Location button opens the Add Location Dialog, enter address fields, notes and other information.

Screen Shot 2022-12-05 at 12.28.54 PM

You can select an existing Folder name, or the default “My Locations” folder name will be used. Icon styles can be selected. Adding address information will automatically trigger a geocode to look up the latitude, longitude. You can also copy and paste latitude and longitude from other applications into the matching fields.

Select Save to add location to the map which will center on that location. Repeat as needed.

Location Quick Add

The Address textbox allows you to type in an address which is geocoded and added to your project under the default “My Locations” folder. You can edit the added location using the normal edit tools.

You may also search here by Point of Interest (POI), such as popular businesses, airports, and government buildings, etc.

Screen Shot 2022-12-05 at 12.30.32 PM

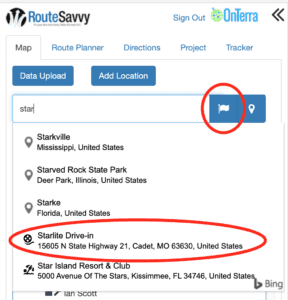
When you see the correct option in the list, click on it, then click the Flag button to the right of the Address bar.


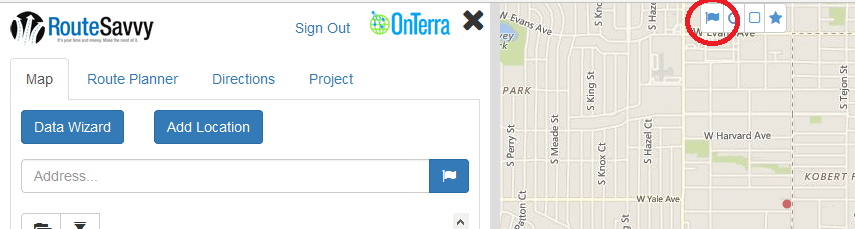
Add Location from Map

This can be done by either right clicking on the map location to add an address or using the map tools. Both options will use the latitude and longitude from the map location and perform a reverse geocode to populate the street address values. These options are useful if you know the location from the aerial image etc, but don’t know the street address.

Right click and select “Add a New Location”

Or from the map tools, select the flag icon, then click the location on the map where you want to add the new location.

If you have questions contact RouteSavvy Support.