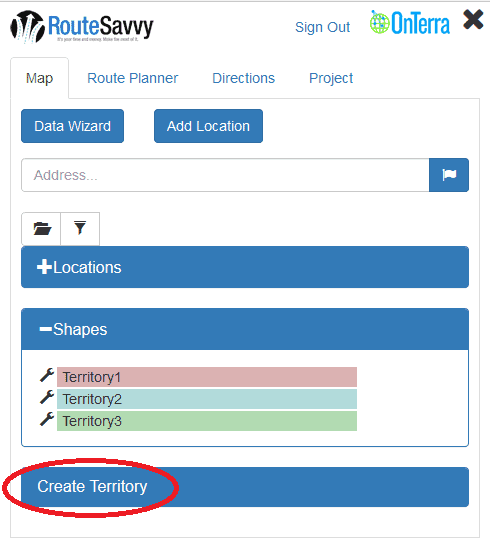
RouteSavvy can support the creation of random territories with the use of Shapes. RouteSavvy also has the ability to create territories/shapes based on geographic areas e.g. boundaries. This includes US Zip codes, US Counties, US States, and Countries. You can import a list of these areas and build a territory or you can build on the fly by clicking on the map.
To get started click on the Territories button in the Map tab.
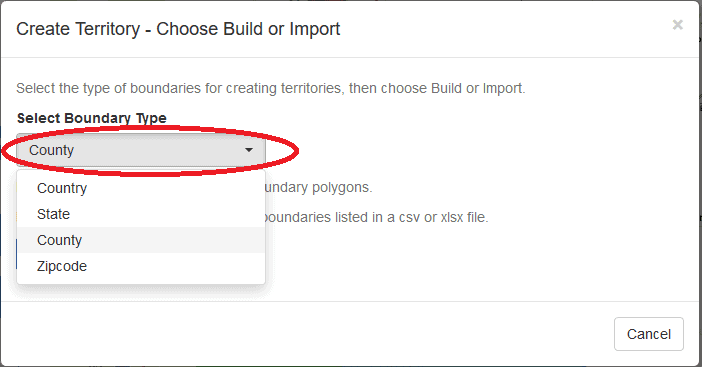
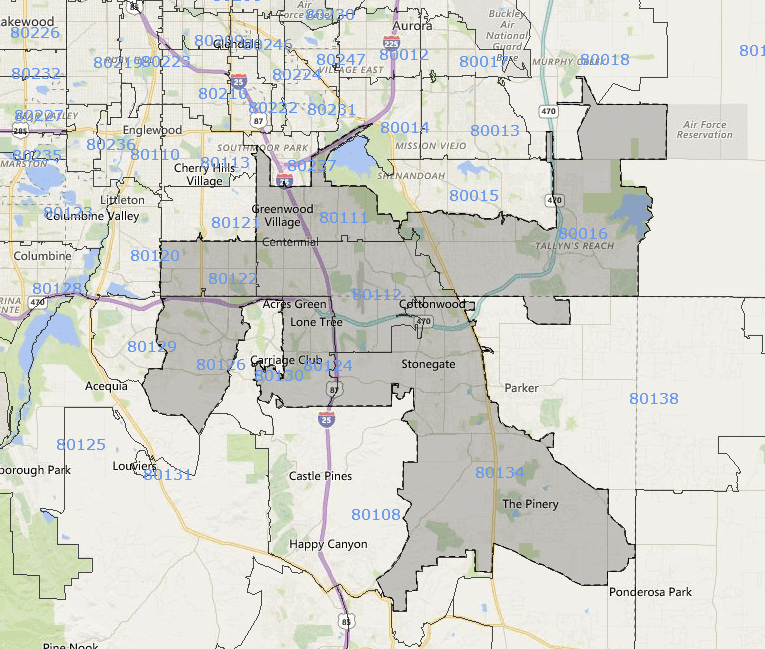
Choose the boundary type, Country, State, US County or US Zipcode from the drop down.
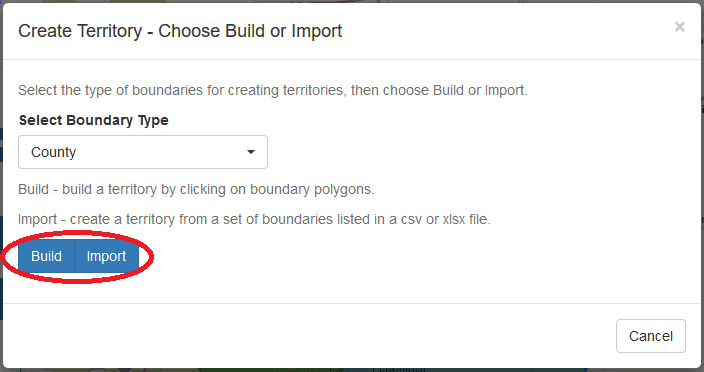
Once the boundary type is selected choose the Build or Import option:
Build Territories
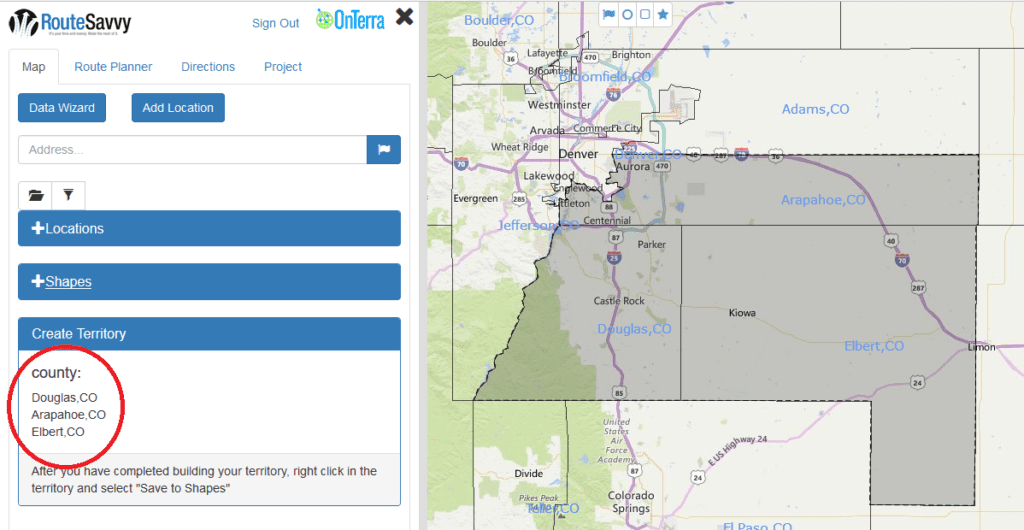
For Build, the boundaries will display on the Map, click inside each boundary to add it to the territory.
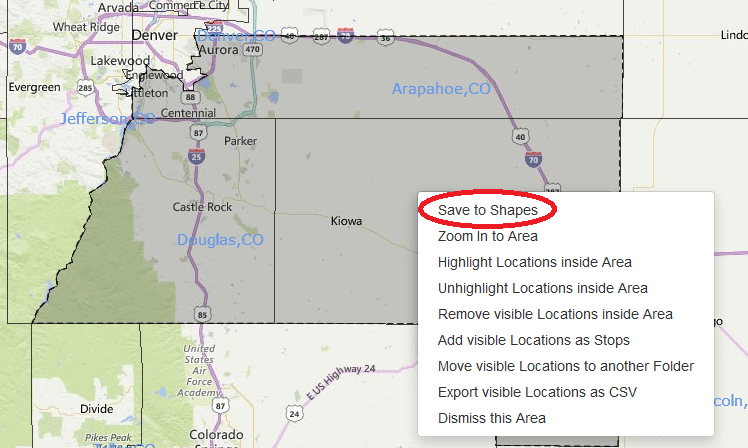
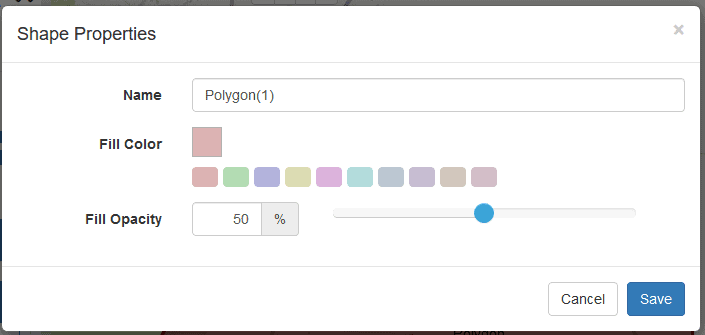
After the territory is created by clicking on boundaries, right click inside the territory and choose Save to Shapes. This will allow you to save the territory inside RouteSavvy. You can choose name, color, and opacity of the territory.
Save shape with selected properties
Import Territories
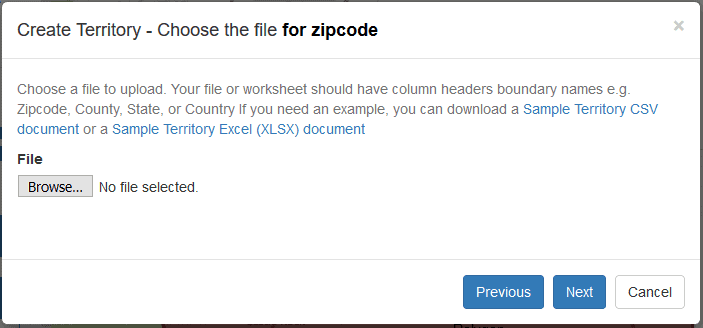
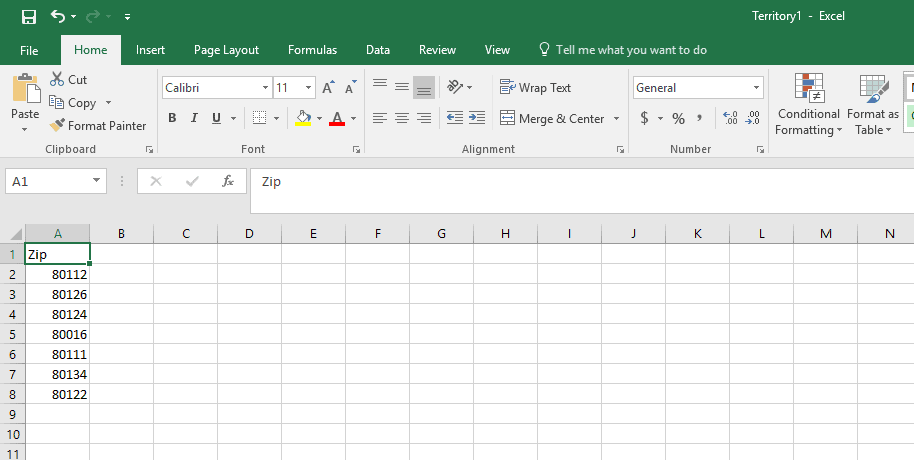
Alternatively, you can import an existing list of boundaries to represent your territory. Note, this can only be done one territory at a time due to web browser limitations. So if you have multiple territories you would need to upload separate files and repeat the process for each territory.
Choose the excel or csv file to import:
(Note: you can upload a file with multiple columns and simply select the pertinent zip / county / state / country field. Countries must be spelled exactly as displayed on Country layer once activated for a manual build. US States can be either spelled out or 2-letter abbreviations. US Counties must be spelled exactly correctly and contain either the state spelled out or 2-letter abbreviation, separate by either one single comma “,” or a single comma followed by a single space “, “. US Zip codes must be 5 digit.)
The territory will be processed and then displayed. The user can continue adding more additional polygons to the selection manually by clicking on them. (Note that polygons cannot be removed from the selection once added.) Once the selection is complete, use the same method as above to right-click in the grey shape to save the final shape.